All Webflow websites come with a super intuitive and easy-to-manage content management system. Adding items like blog posts, news, testimonials, FAQs, and team members can be handled by the client or their marketing team without too much hassle. When I structure databases, I always keep my client in mind. I pay attention to keeping them organized, with fields named clearly and explained, and I leave tips wherever they're needed. I also assume that a new team member of my client may take charge of the website, so my job is to make them as comfortable as possible when it comes to understanding how everything is built.
But once everything is structured and implemented, the reins are in my client's hands to keep everything well maintained. To assist my client, I always provide them with detailed written and video instructions on what needs to be done.
Checklist
Here's a handy checklist that can help everyone – Webflow website owners, marketing folks, and even us Webflow developers – when it comes to adding a blog post:
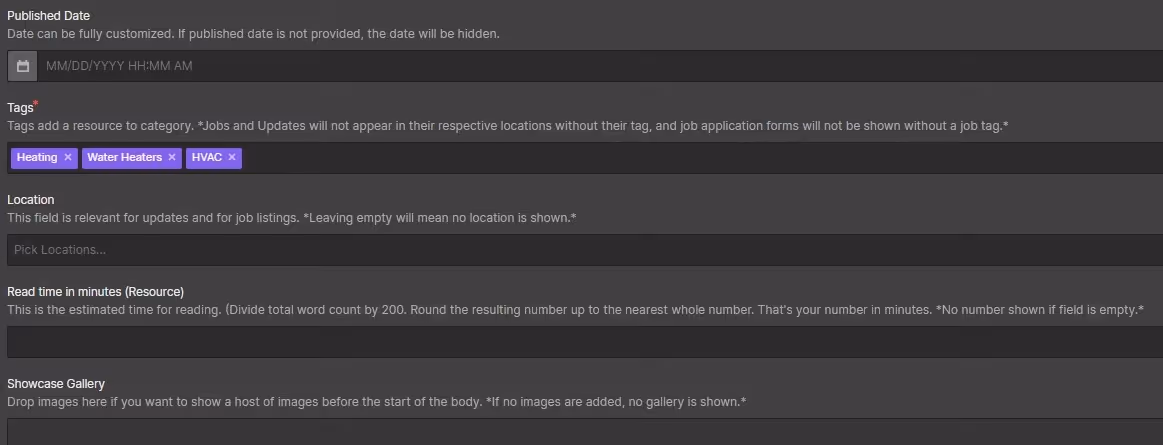
Prepare Your Assets in Advance:
Make sure your images are a reasonable size, generally not exceeding 1600px in width. Optimize them by compressing to WebP or AVIF format (I usually use built-in Webflow compression tools or external tools like squoosh.app). Also, give your assets meaningful names, even though users won't see them on the front end. For videos, upload them to your video platform and add titles and descriptions.
Think About Connections:
Your blog post might connect to other databases like categories, tags, or authors. Plan these connections in advance.
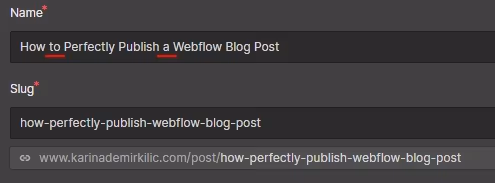
Customize the Slug:
Keep it short and meaningful. Remove unnecessary articles and words. Bonus points if your slug contains a keyword!
Craft Your Body Text:
Pay attention to grammar and keep your text structured with headings (2nd, 3rd, and 4th levels). Break it into paragraphs, avoiding long blocks of text. Use lists as actual lists, not plain text. And, please, no empty paragraphs! Also, remember to use full-size images and add alt texts.
Optimize images:
Add a main image and a thumbnail image(if you have one), and all body images in webp format, following size requirements. Don't forget to fill in those dedicated alt text fields for main and thumbnail images and settings for in-text images!

SEO Optimization:
Create an SEO-optimized title and meta description, then pop them into their designated fields.
Internal Links:
If it fits naturally, insert links to related blog posts within your blog content. It keeps things engaging!
Request Google Indexing:
After your new blog post is published, don't forget to request Google to index the page for better discoverability.

That's it! Hope this checklist makes your blog post creation a breeze. Happy blogging! 🌟"